
Streamline Your Workflow with DocStation’s New Patient List Export Feature
In today’s fast-paced pharmacy environment, efficiency is key. Pharmacists need tools that can streamline their workflow and save valuable time. DocStation understands this need and has introduced a new feature that allows users to export a list of patients effortlessly! In this blog post, we will guide you through the process of exporting patient lists from DocStation and explain how you can apply filters to generate customized reports, all in just a few simple steps.
Why Export Patient Lists?
Before diving into the process, let’s briefly discuss why exporting patient lists can be so beneficial. Having the ability to export patient information from DocStation can significantly enhance your practice’s efficiency and organization. Whether you need to communicate with referring physicians, perform quality assessments, or conduct research, having patient data readily available in a downloadable format can be a game-changer.
Now, let’s explore how to export patient lists from DocStation step by step.
Step 1: Navigate to the Patients Tab
To get started, log in to your DocStation account and navigate to the “Patients” tab. This is where you’ll access the list of patients you want to export.
Step 2: Filter the Patient List
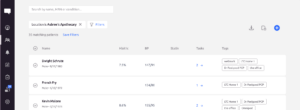
DocStation offers robust filtering options, allowing you to customize your patient list to meet your specific needs. You can filter patients by location, diagnosis, assigned tasks, and more. Here’s how to do it:
- For example, you may want to export a list of patients at a specific location. Select the desired location from the dropdown menu.
- If you want to export patients with a specific diagnosis on file, use the diagnosis filter to narrow down the list.
- To focus on patients with tasks that need to be addressed, apply the tasks filter. This is especially useful for prioritizing patient care.
You can add as many or as few filters as needed to create a tailored patient list.
Step 3: Click the Download Icon

Once you’ve applied your filters and have the patient list you want to export displayed on the screen, it’s time to generate the report. Look for the download icon located in the top right corner of the screen. Click on it to initiate the export process.
Step 4: Save the CSV File
After clicking the download icon, DocStation will generate a CSV file containing the patient information you specified. You can choose to save this file to a specified local folder on your computer.
The exported CSV file will include essential patient details such as:
- Patient ID
- Name
- Gender
- Date of Birth
- Tags (for categorization)
- Tasks (to keep track of patient needs)
DocStation’s new patient list export feature is a valuable addition to an already powerful healthcare management tool. Exporting patient lists has never been easier, and this feature can help you save time, enhance communication, and improve patient care.
By following the simple steps outlined in this guide, you can quickly generate customized patient reports to meet your practice’s unique needs. Take advantage of this feature to boost your efficiency and make the most of your time.
Streamline your workflow with DocStation today and experience the benefits of efficient patient list exportation. Your patients and your pharmacy will thank you.